
I recently sold my house in Loudoun county VA and moved to a farm in the mountains between Bluegrass VA and Monterey VA. I had planed on moving the 12x24 Beehouse to this new location 3-1/2 hours away.
The following is how things transpired during the move.
Lets start by taking a look at the beehouse.
The beehouse is a 12’x24’ structure. It is an Amish building using 2x4 construction.
I have insulated the building. Most of the side walls have been covered in white pegboard.
Shown here is the front view with the 12’x12’ shelter in the front.
Left rear view of the house. Note that the side door I added to this side of the house is not shown as this is an early picture of the Amish garage before it became a beehouse.
Another picture of the left side after it was converted to a beehouse.
Shown here is the right side of the beehouse with the original door.
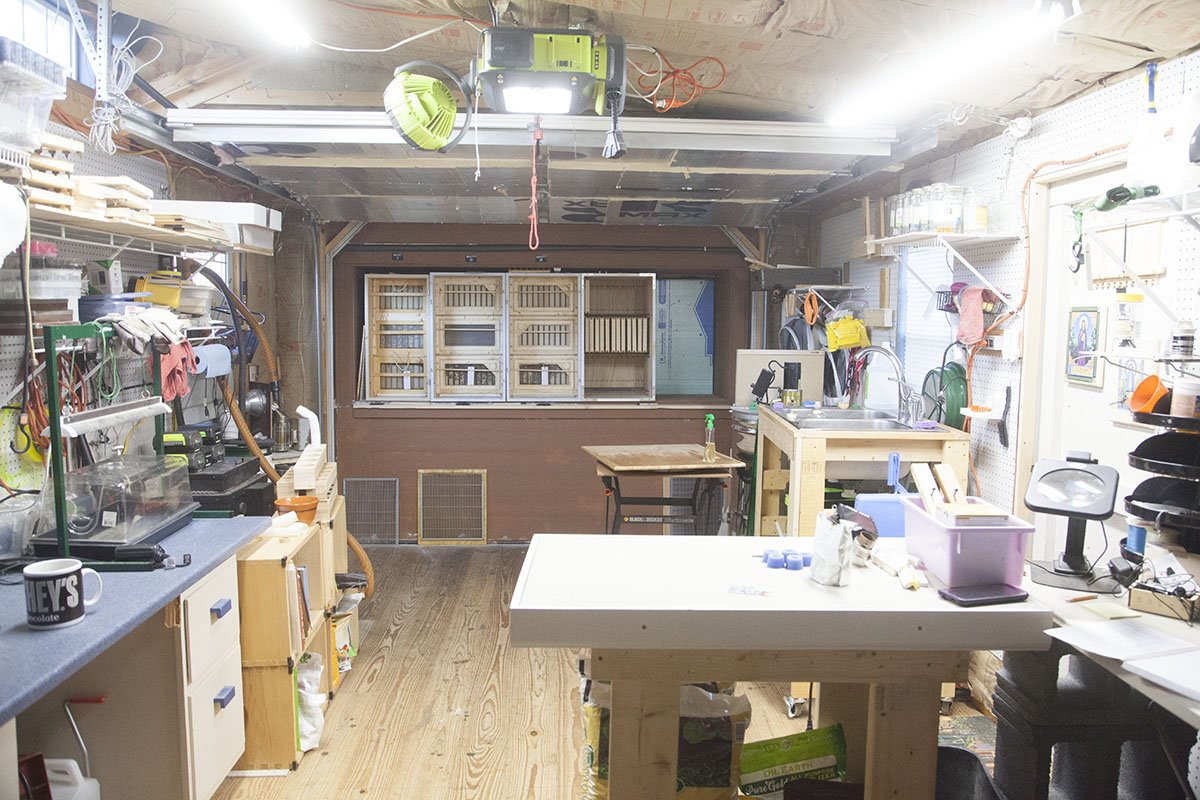
Shown here is the inside of the beehouse. Everything but the insulation, pegboard and wire shelves inside will have to be removed.
Step 1
In order for the transport truck to gain access to the beehouse the two fule tanks shown here must be removed.
The tank remove ended up being easier than I thought. I strapped the tanks to my front loader and they were transported to a trailer. The structure was pushed over with my tractor and the area smothed.
Step 2
The next step is to move the bees. The trim is removed and a tracktor is used to transfer the hives to a trailer.
Not that in Loudoun we were having spring weather and have to wait until evening to make the move.
The foam is secured to each hive and doors are added.
The front openings are all closed.
The hives are transferred to a box trailer.
The trailer was moved to the new farm. Unfortunatly it was very late and pouring down rain when we arrived.
Early in the mornining during a lull in the rain we started to place the hives in a temporary location.
The hives will be placed in the end of a high tunnel. This will be thier home for the next couple months.
Let those bees go.
The landing board on the last hive did not survive. The new design for the landing makes it very easy to make repairs as needed.
The four active hives were placed in a temporary location as we still need to move the beehouse.
I made sure the hives were level..
The hives were secured and top of the hive is covered with a tarp.
The new location is about 3000 feet higher and much cooler, they seem to be triving.
Step 3
The next step is to remove the shelter in the front of the beehouse, as well as the enclosure for the hives.
I didn’t get any pictures of the shelter and enclosure removal. It took us about 4 hours to complete. We were carful as many of the components will be reused.
Step 4
Next we have to clean out the inside of the hive and remove anything attached to the outside.
The inside is emptied and cleaned.
The nuc structure is removed.
The area around the beehouse is cleaned up to make access easier for the mover.
The beehouse is ready to move.
Step 5
The beehouse will be picked up and delivered in about a week.
This gave us a chance to finish the pad.
We leveled the location and added two different sizes of gravel. This gravel pad was then leveled.
Step 6
The beehouse in its new home.
Things are going to be setup a little different.
Both sides of the roof took some shingle damage.
The old door will need to be covered.
The beehives will be placed in the rear of the beehouse.
To be Continued
Stay tuned for the changes to the beehouse in its new location.